Have you ever craved a quick summer dessert that’s both elegant and effortless? You’re not alone—Google Trends show a 64% surge in searches for easy summer dessert recipes during May through August.
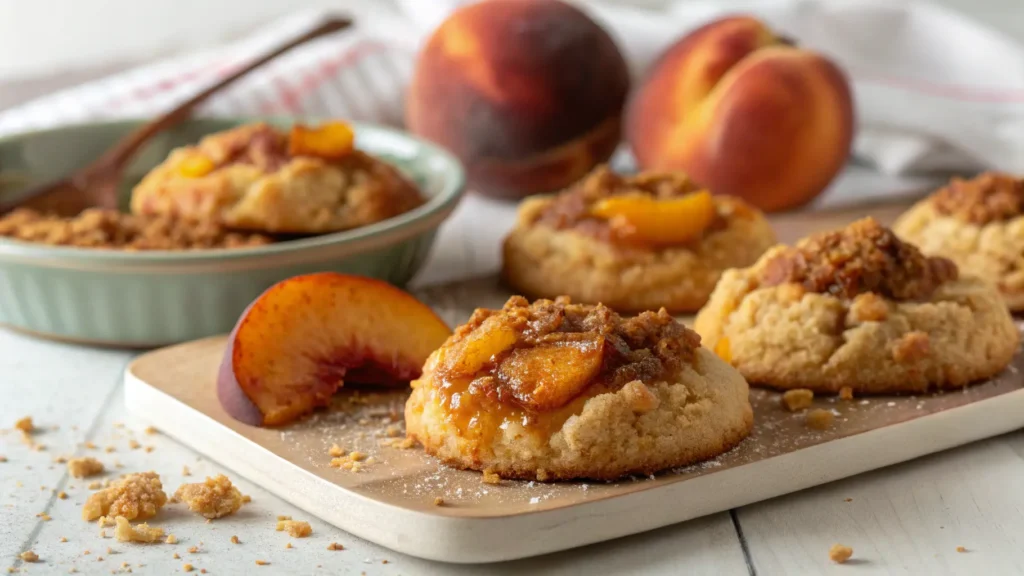
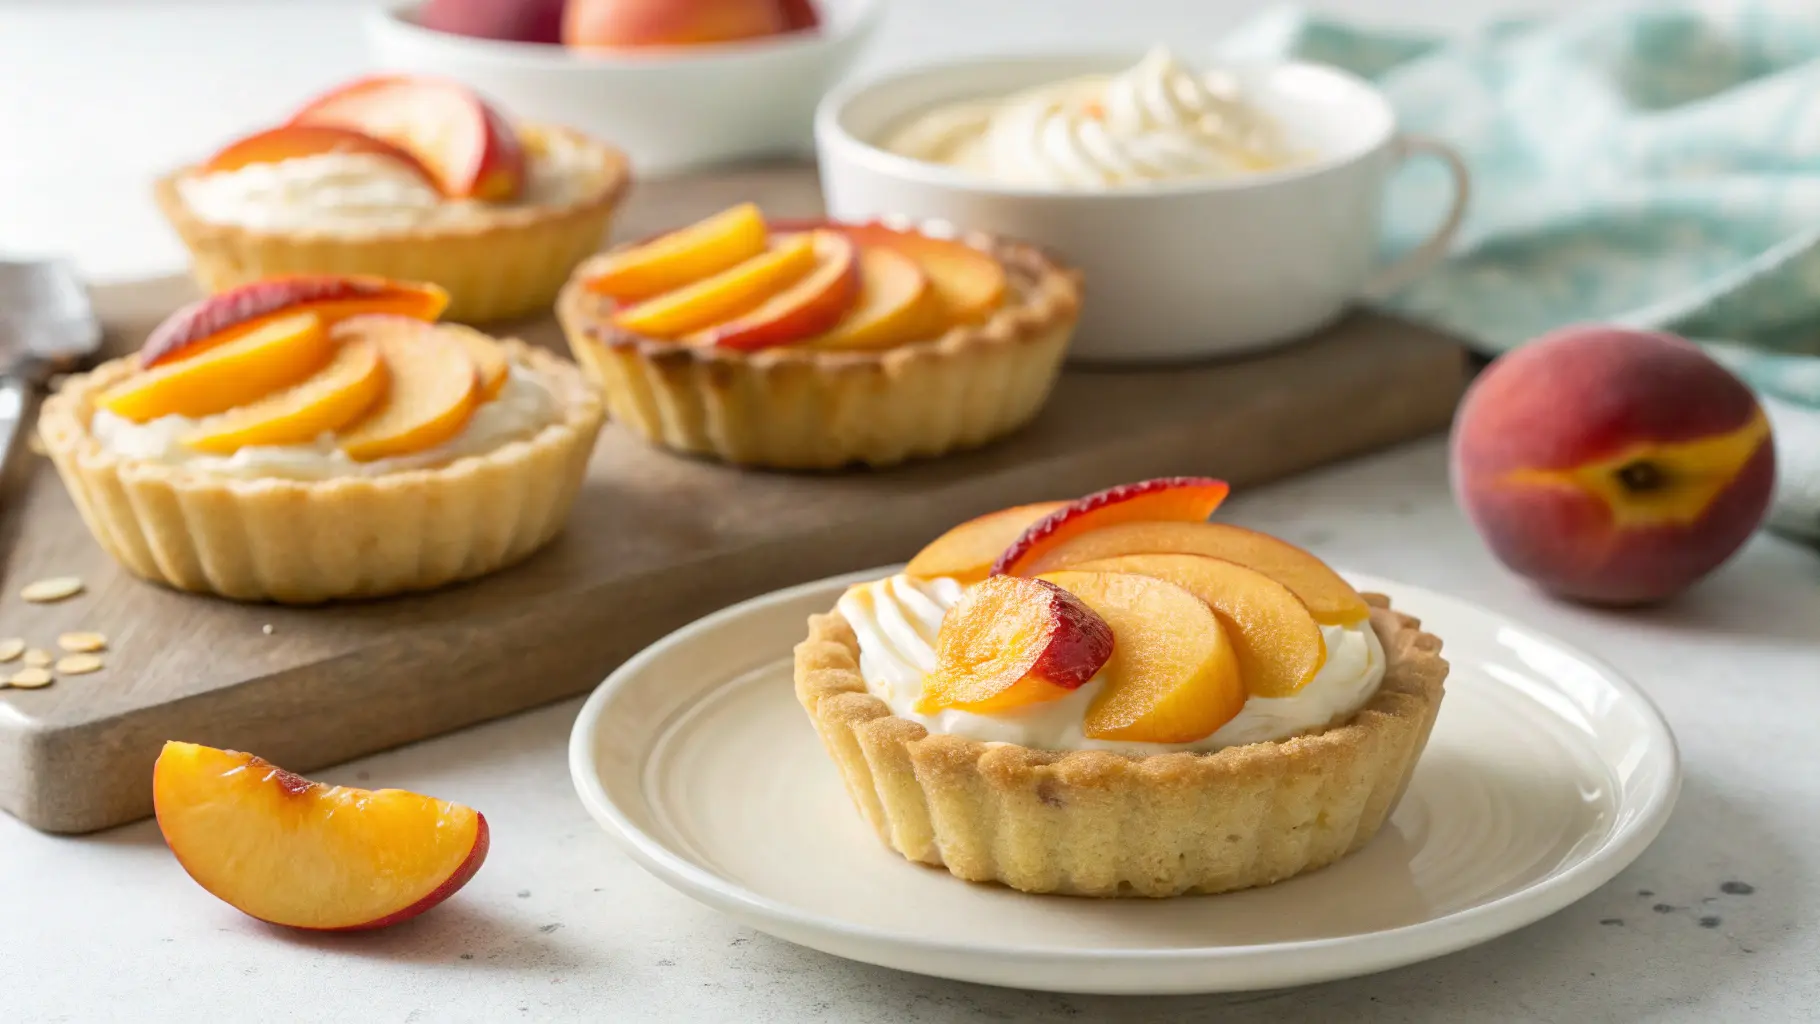
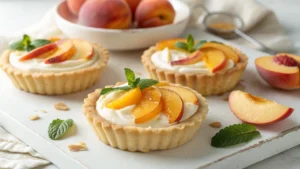
Craving a quick summer dessert? These Mini Peach and Cream Cheese Tarts are easy, delicious, and perfect for parties. Try the recipe today! With just five simple steps, this no-fuss treat is ideal for warm-weather get-togethers, brunches, kids’ parties, or those spontaneous sweet cravings.
These tarts blend the creaminess of cheese with the luscious sweetness of ripe peaches, all wrapped in a buttery, golden shell. Whether you’re a seasoned baker or just getting started in the kitchen, you’ll love how easily this recipe comes together.
Let’s get baking!
Ingredients List
Every delicious dessert starts with quality ingredients. Here’s what you’ll need to create these irresistible mini peach and cream cheese tarts:
🍑 1 cup fresh or canned peach slices (peeled and thinly sliced)
🧀 8 oz cream cheese (softened to room temperature)
🥄 ¼ cup granulated sugar
🧂 ½ tsp pure vanilla extract (or almond extract for a unique twist)
🧈 2 tbsp unsalted butter (melted)
🥚 1 egg yolk (for richness and color)
🥧 12 mini tart shells (store-bought or homemade)
🎉 Optional Toppings:
- A sprinkle of cinnamon or nutmeg
- Fresh mint leaves for garnish
- Honey drizzle for extra sweetness
🥕 Ingredient Swaps & Tips:
- No cream cheese? Use mascarpone or Greek yogurt for a tangier flavor.
- Vegan? Substitute with dairy-free cream cheese and egg replacer.
- No peaches on hand? Try nectarines, apricots, or even mango!
These ingredients pack rich textures and flavor layers into every bite of the tart, elevating even casual desserts into show-stopping finales.
Timing
One of the best things about this recipe is how refreshingly quick it is. From prep to plate, you’ll spend less than an hour!
- ⏱️ Preparation Time: 15 minutes
- 🔥 Baking Time: 25 minutes
- ❄️ Cooling Time: 10 minutes
- 🕐 Total Time: 50 minutes
That’s almost 20% faster than most fruit tart recipes, which average around 60–65 minutes. So yes, you can whip these up on a whim before your guests arrive!
Step-by-Step Instructions
Step 1: Preheat and Prep the Base
Preheat your oven to 350°F (175°C). If using frozen tart shells, give them 5–10 minutes at room temperature to thaw slightly. Arrange them on a baking tray lined with parchment paper.
💡 Tip: Lightly brush the inside of each shell with melted butter before filling—this helps create that golden, crispy texture everyone loves.
Step 2: Create the Creamy Filling
In a medium mixing bowl, beat the softened cream cheese, sugar, vanilla extract, and egg yolk together until smooth and velvety.
🎯 Pro Tip: Use an electric mixer for ultra-silky texture, but if mixing by hand, make sure your cream cheese is at room temperature to avoid lumps.
Step 3: Fill the Tart Shells
Spoon about 1 tablespoon of the cream cheese mixture into each tart shell, spreading it evenly. Next, layer 2–3 peach slices neatly on top of the cream cheese.
🧡 Personal Touch: Mix in a sprinkle of cinnamon or a teaspoon of honey right into the filling to tailor the flavor to your liking.
Step 4: Bake to Perfection
Place the tray in the preheated oven and bake for 22–25 minutes or until the filling is set and the tart shells are golden brown.
👀 Watch carefully during the last five minutes—oven temps can vary and you want that just-right golden finish!
Step 5: Cool & Garnish
Remove the tarts from the oven and let them cool on a wire rack for at least 10 minutes. Garnish with a mint leaf, a drizzle of honey, or a dash of powdered sugar for next-level presentation.
🎂 Hosting tip: Plate these mini tarts on a large serving tray with a scoop of vanilla bean ice cream on the side for an elegant dessert course.
Nutritional Information
These mini tarts deliver indulgent flavor without overwhelming the calorie count. Here’s the approximate nutrition breakdown per tart:
- Calories: 160
- Total Fat: 9g
- Saturated Fat: 5g
- Carbohydrates: 18g
- Sugar: 10g
- Protein: 2g
📊 Insight: Compared to full-sized fruit tarts which average 300–400 calories per slice, these mini versions let you indulge in portion-controlled bites.
Healthier Alternatives for the Recipe
Want to make them healthier without losing the magic? Here are a few substitutions:
- Use low-fat cream cheese or Greek yogurt to slash calories
- Swap sugar with coconut sugar, honey, or maple syrup
- Opt for whole wheat or almond flour tart shells for added fiber
- Add chia seeds to the filling for extra nutrients and texture
For plant-based diets:
- Use dairy-free cream cheese and egg replacer like JUST Egg or flaxseed meal
- Choose vegan tart shells or prepare a crust using crushed oats and coconut oil
📢 Bonus: You can even turn this into a no-bake summer dessert by chilling the filled tarts instead of baking them.
Serving Suggestions
Make your dessert table shine with these creative and personalized serving ideas:
🍨 Serve with a scoop of vanilla or peach sorbet
🍾 Pair with sparkling wine or a peach bellini during summer brunches
🎉 Use them as part of a DIY dessert board, alongside mini cheesecakes and chocolate-dipped fruits
🍴 Serve slightly warm with a dollop of whipped cream for cozy evening treats
👩🍳 Reader’s Choice: Sprinkle chopped nuts or granola on top for a crunchy contrast!
Common Mistakes to Avoid
Even simple recipes can go sideways. Watch out for these common pitfalls:
❌ Filling Overload: Too much cream cheese mixture causes overflow and soggy crusts.
✅ Solution: Stick to one tablespoon per tart and spread it evenly.
❌ Using Cold Cream Cheese: Difficult to mix and results in lumpy filling.
✅ Solution: Take it out at least 1 hour before baking.
❌ Over-Baking: Cream cheese filling can become rubbery if overcooked.
✅ Solution: Stick to the 22–25 minute range and watch carefully.
Storing Tips for the Recipe
Here’s how to keep your tarts tasting bakery-fresh:
🧊 Refrigeration: Store in an airtight container for up to 4 days in the fridge.
🧁 Freezing: Wrap each tart in plastic wrap and store in a sealed bag for up to 1 month. Thaw and refresh in the oven at 300°F for 5–7 minutes.
🕑 Make-Ahead Option: Prepare the filling and pre-slice peaches up to 2 days in advance. Assemble and bake fresh for best texture and flavor.
📌 Insider Hack: Store with a paper towel in the container to absorb moisture and keep tart shells crisp.
Conclusion
Mini desserts, big flavor—that’s the beauty of these tarts.
Craving a quick summer dessert? These Mini Peach and Cream Cheese Tarts are easy, delicious, and perfect for parties. Try the recipe today! With only five simple steps, you can indulge in rich, creamy sweetness layered with juicy peaches—all in under an hour.
Try this recipe for your next brunch, family dinner, or summer soirée. Love it? Share your version on social media and tag us! 🍑✨
You might also like:
- 5-Minute No-Bake Strawberry Cheesecake Cups
- Easy Lemon Curd Tartlets with Almond Crust
- Fresh Fruit Galette in 30 Minutes
👇 Drop a comment—what summer fruit would you try in this recipe?
FAQs
❓Can I use canned peaches instead of fresh?
Absolutely! Just be sure to drain them well and pat them dry with a paper towel so they don’t water down the filling.
❓What are the best cream cheese alternatives?
Greek yogurt, mascarpone, or ricotta cheese all work great. For vegan options, try almond or coconut-based dairy-free cream cheeses.
❓Can I make these tarts ahead of time?
Yes—either prepare the filling in advance or bake the entire tarts 1–2 days ahead. Just store them in the fridge and garnish fresh before serving.
❓Can these be made gluten-free?
Sure! Use certified gluten-free mini tart shells or bake your own using gluten-free flour blends.
❓Why did my crust get soggy?
That usually happens from excess moisture in fruit or overfilling. Pat fruit dry and use minimal liquid-based fillings for best results.